SOCIAL PLANNER
WATCH THE TUTORIAL
This SOP explains how to access Social Planner, connect the required social accounts, create a post, and publish, schedule, or request approval for content. It also covers recurring posts and how to verify that posts have been scheduled successfully.

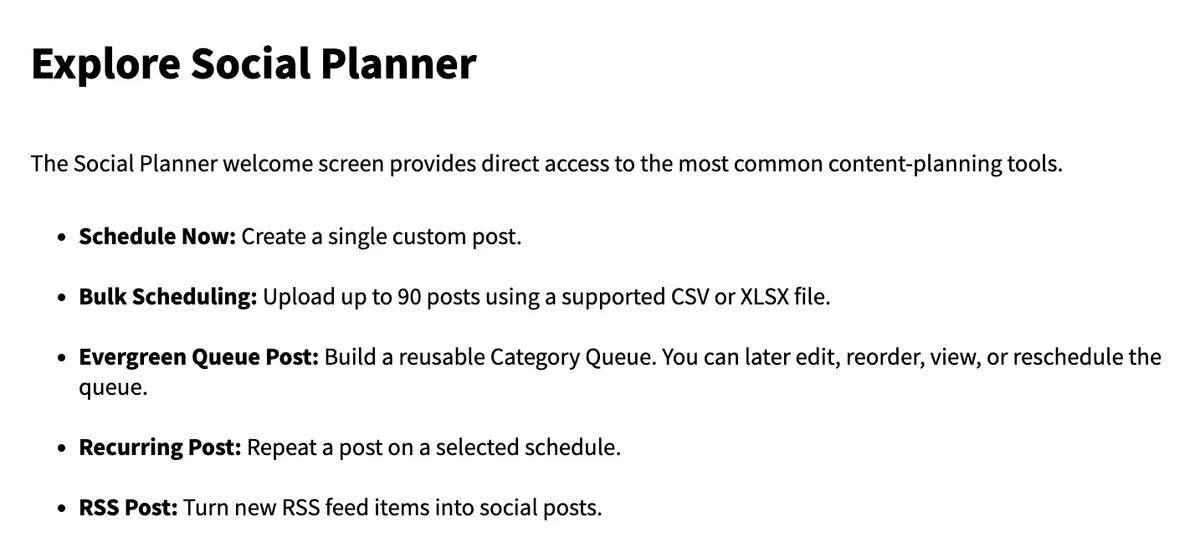
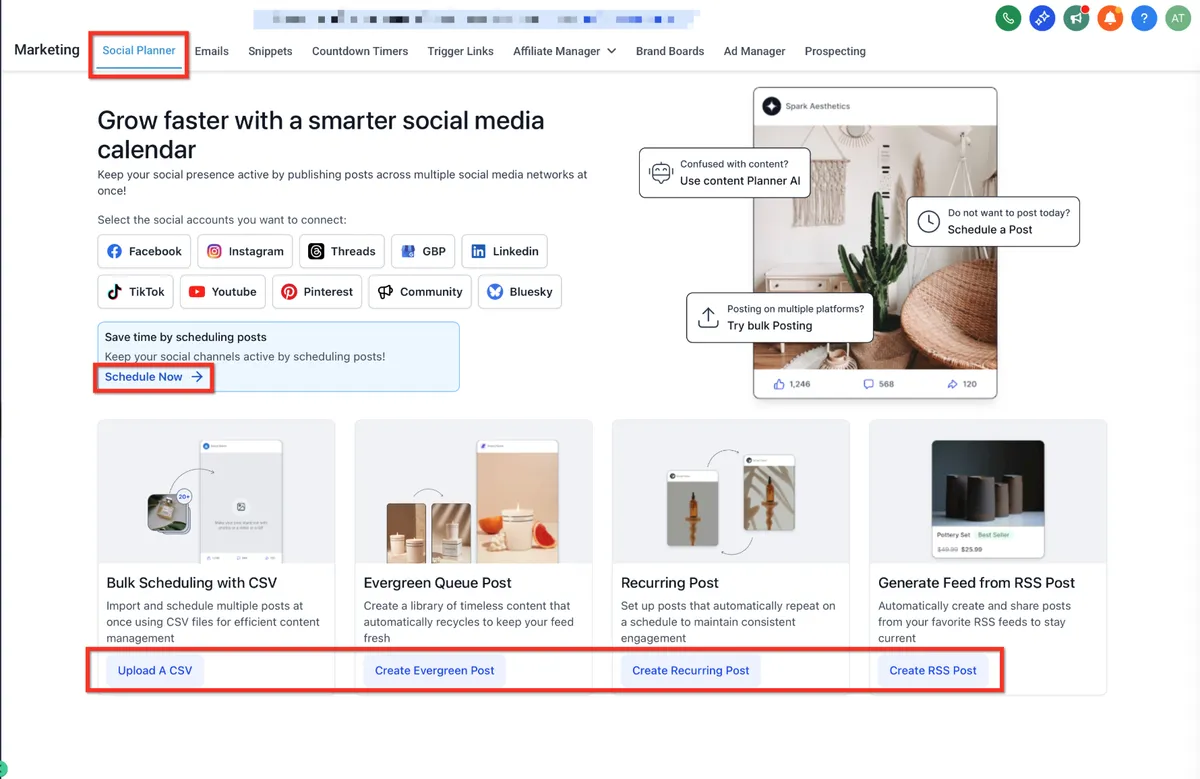
1. Connect Your First Social Account
Connecting an account authorizes JOBVIZER to publish to the selected page, profile, channel, board, or location.
Go to Marketing → Social Planner.
Select the social platform you want to connect.
Sign in and approve the requested permissions.
Select the page, profile, channel, board, or location you want to manage.
Complete the authorization process.
Confirm that the account appears in Social Planner.
2. Create Posts From Social Planner Templates
Templates provide ready-to-use content that you can customize and schedule for connected social accounts.
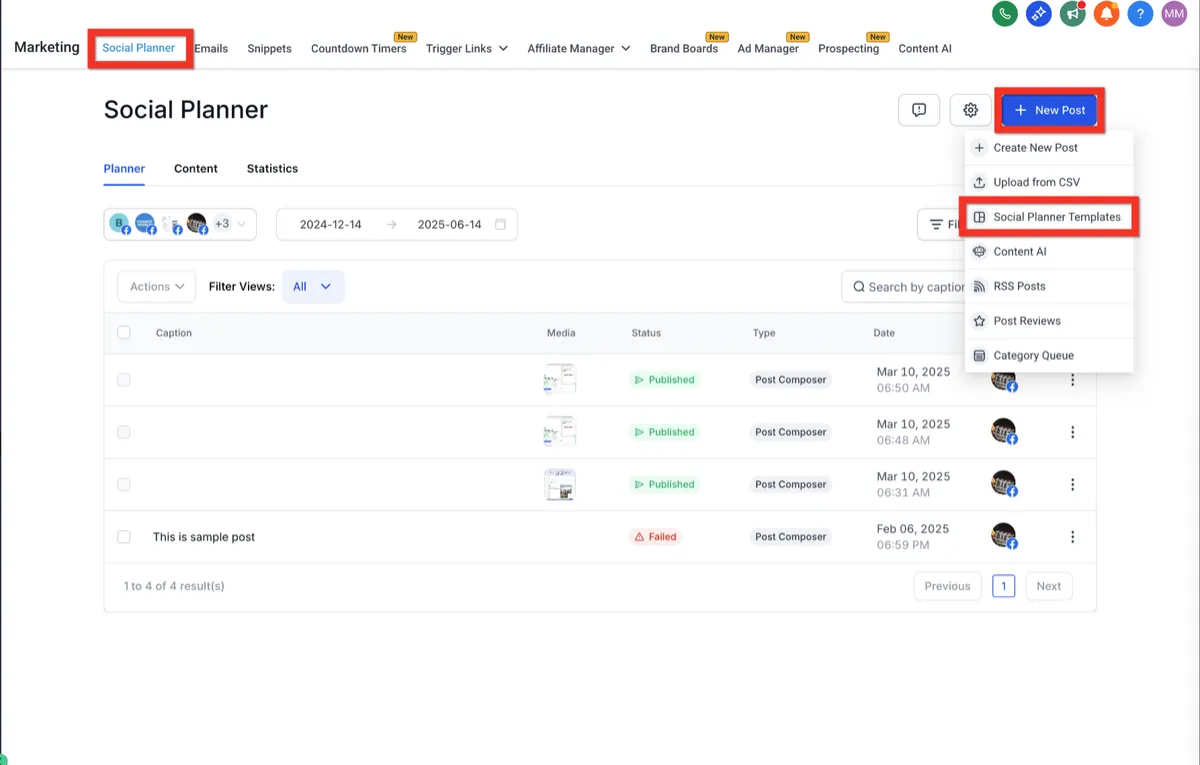
Go to Marketing → Social Planner.
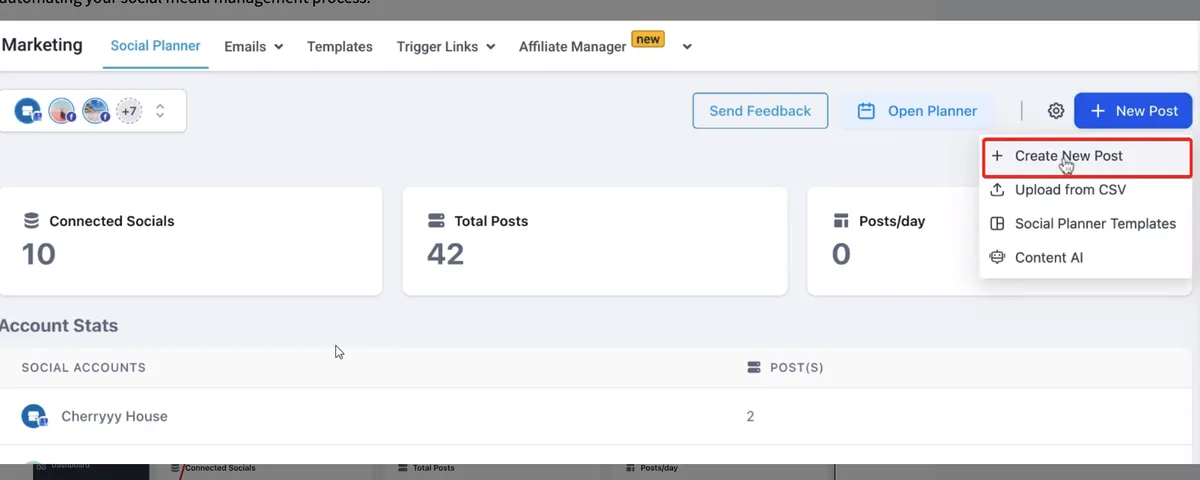
Click + New Post.
Select Social Planner Templates.
Search, browse, or filter the available templates.
Select a template and click Continue.
Open Content → Template Library when prompted.
Find the selected template and click Select Socials, represented by the plus icon.
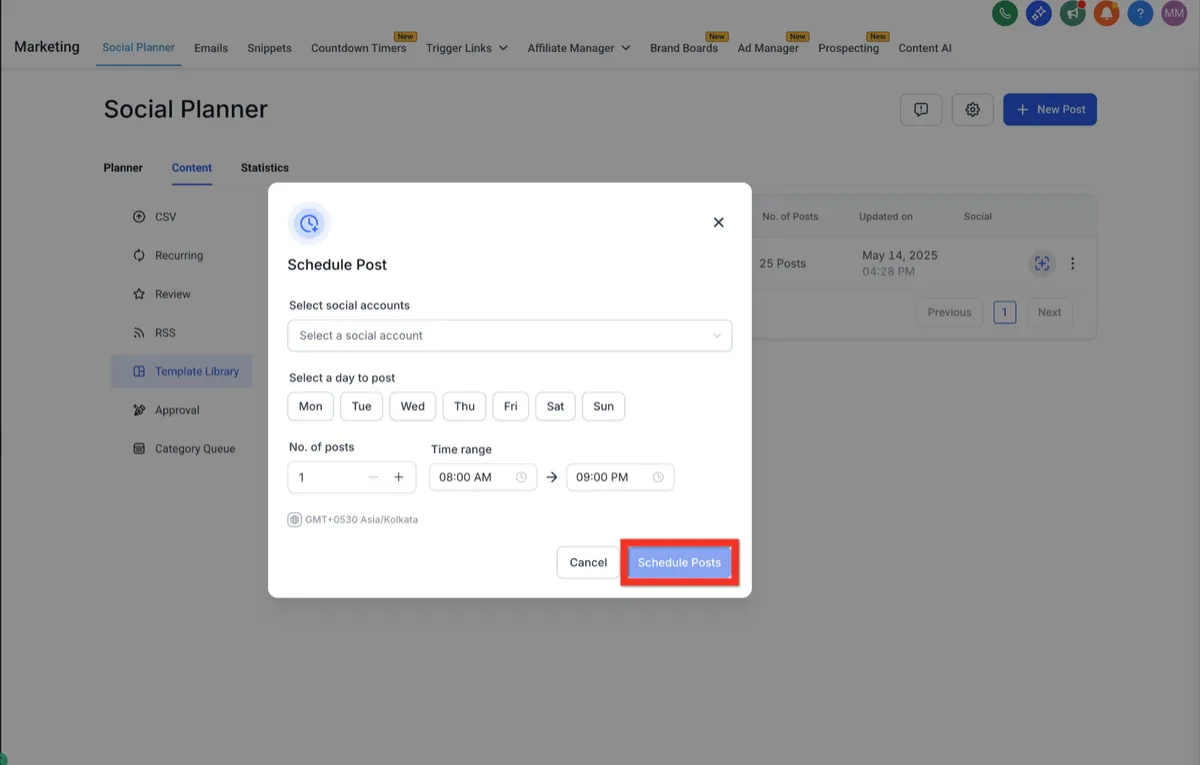
Select the social accounts that should receive the posts.
Choose the posting days, number of posts, and time range.
Confirm the timezone shown in the scheduling window.
Click Schedule Posts.
Open Review & Schedule after the template is processed.
Review the captions, media, accounts, and scheduled times.
Correct any flagged errors.
Click Import to add the approved posts to the planner.
How to Customize post for each socials?
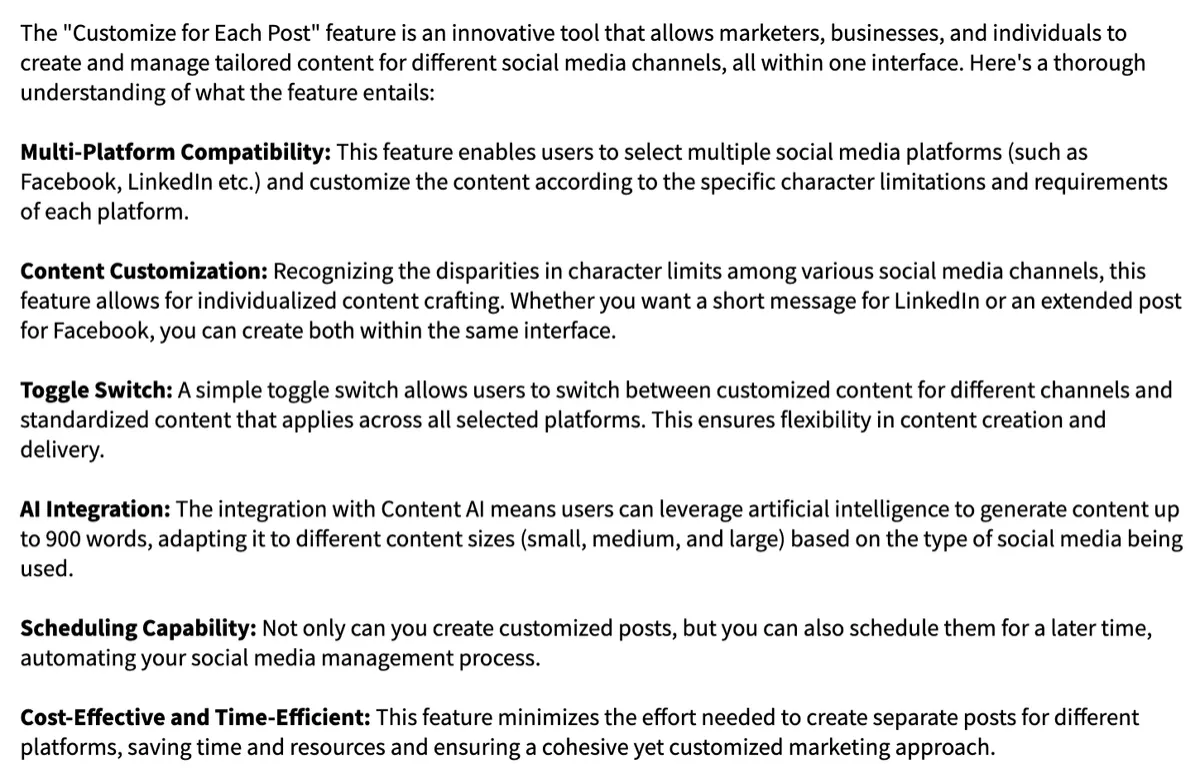
Revolutionize social media marketing with our new 'Customize for Each Post' feature. Tailor your content for different platforms, effortlessly overcoming character limitations and image/video format barriers, and manage diverse campaigns all in one place. Experience unparalleled flexibility in crafting unique messages for each social network with a simple toggle.
How to use this feature?
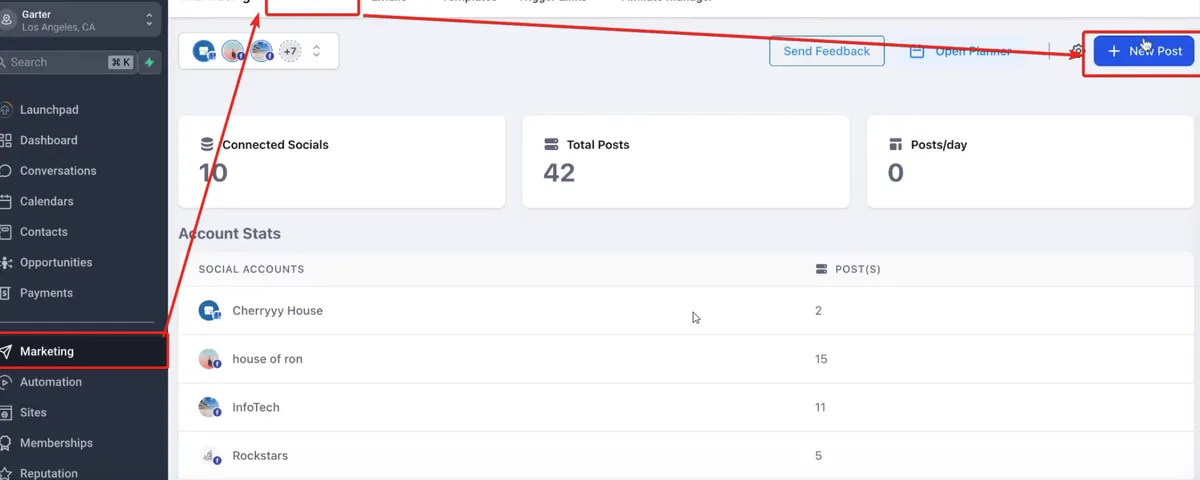
Navigate to the Marketing Section:
Select the "Marketing" tab from the sidebar menu.
Click on the "Social Planner" option.
Click on New Post:
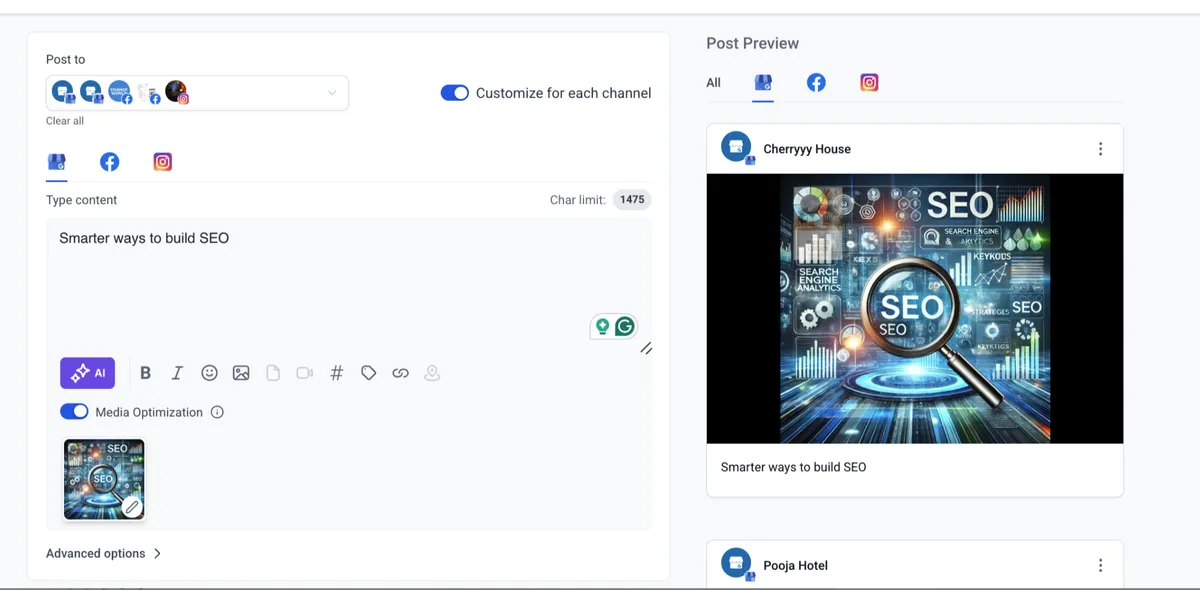
Choose to Customize for Each Channel:
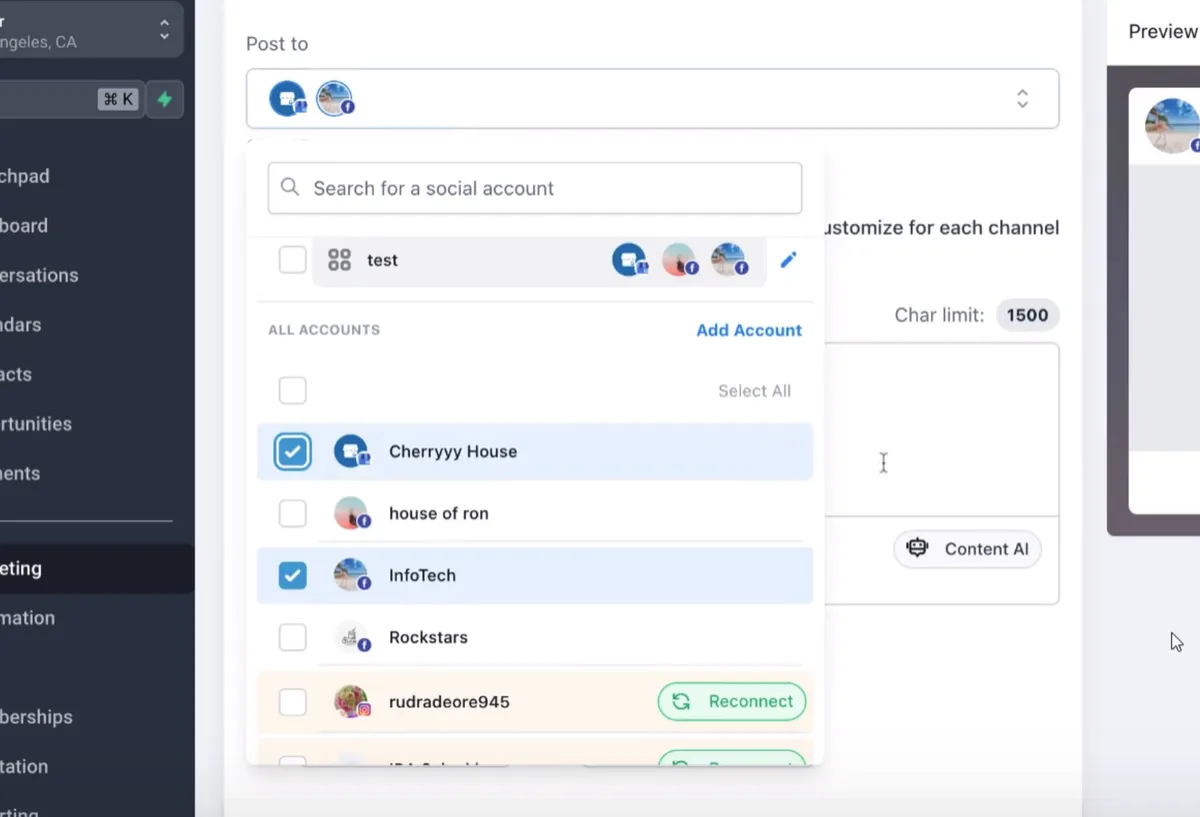
To get the customization option to appear, you need to select multiple social media channels, such as Facebook, Instagram, LinkedIn, GMB (Google My Business), etc.
Choose to Customize for Each Channel:
To get the customization option to appear, you need to select multiple social media channels, such as Facebook, Instagram, LinkedIn, GMB (Google My Business), etc.
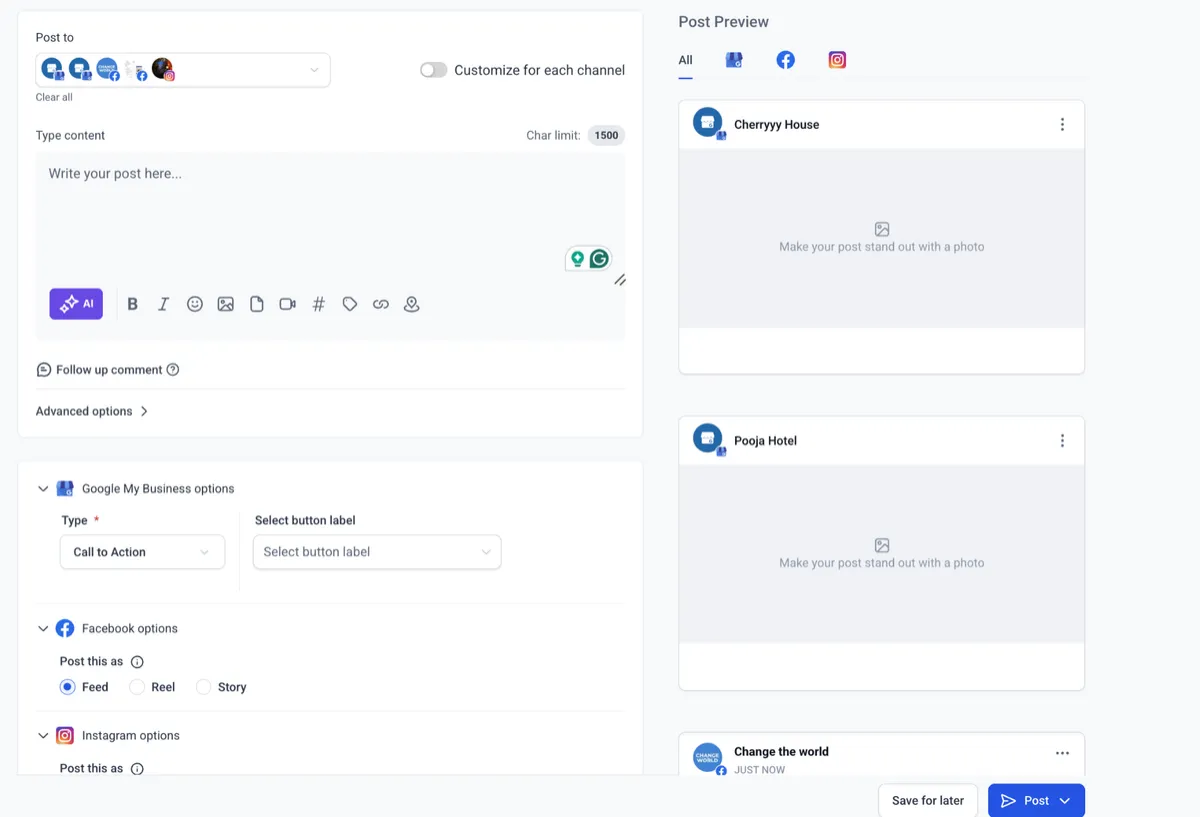
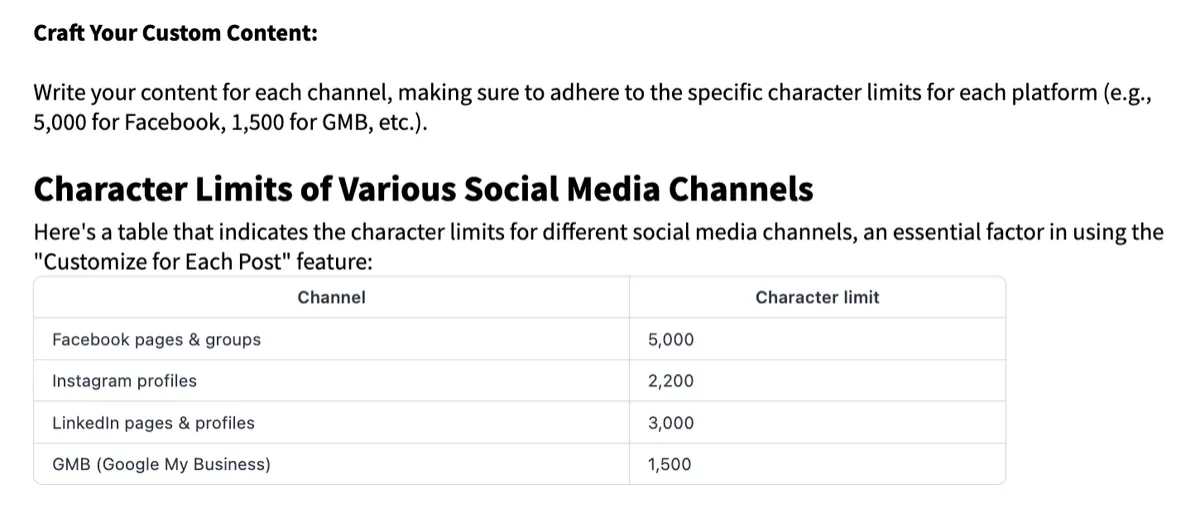
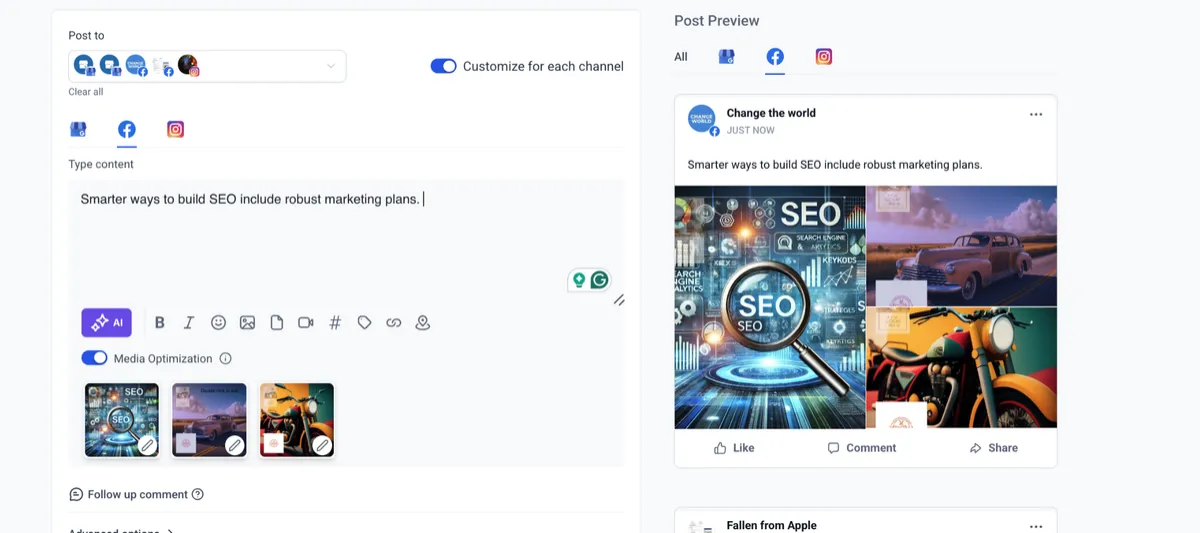
You can view and edit the content for different channels separately, ensuring that each post aligns with the platform's character limit and audience preferences.
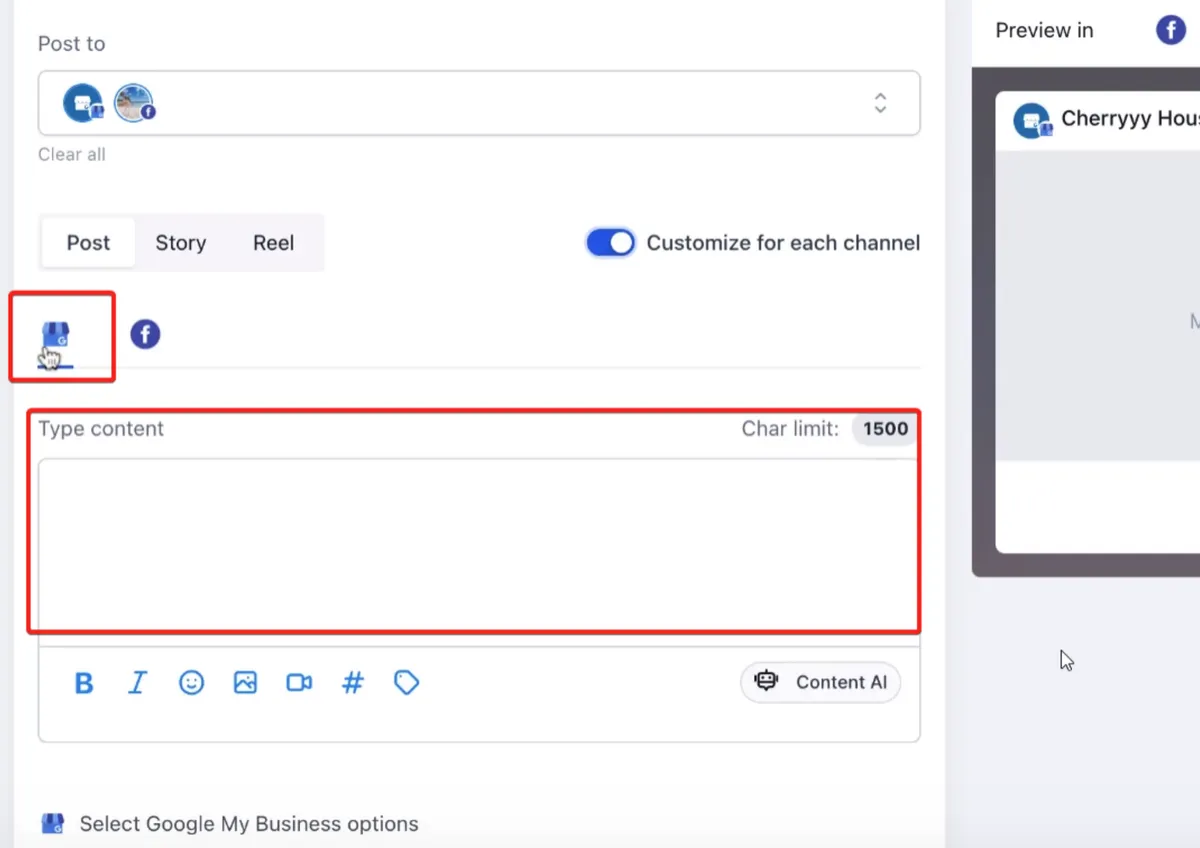
You can add images, videos, or other multimedia elements to enhance your post if applicable for each social media.
JOBVIZER MARKETING SUPPORT PORTAL© 2026ALL RIGHTS RESERVED