MODIFYING THE DASHBOARD
jobvizer crm video tutorial
This SOP explains how to customize the default dashboard or create a new dashboard in JOBVIZER so team members can track the metrics that matter most. It also covers widget setup, template selection, and permission management.
1. OPEN THE DASHBOARD
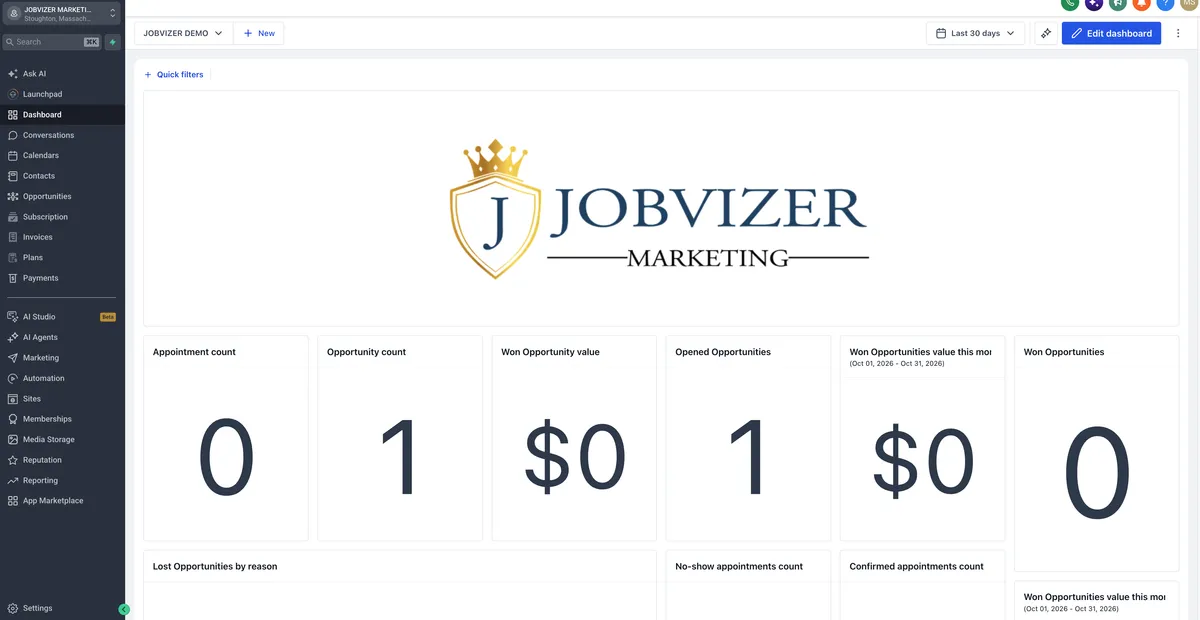
Log in to JOBVIZER and land on the main dashboard.
Treat this screen as the business command center for quick performance visibility.
Review the default dashboard to understand what is currently displayed before making changes.
Identify whether the default metrics are useful or too generic for your needs.
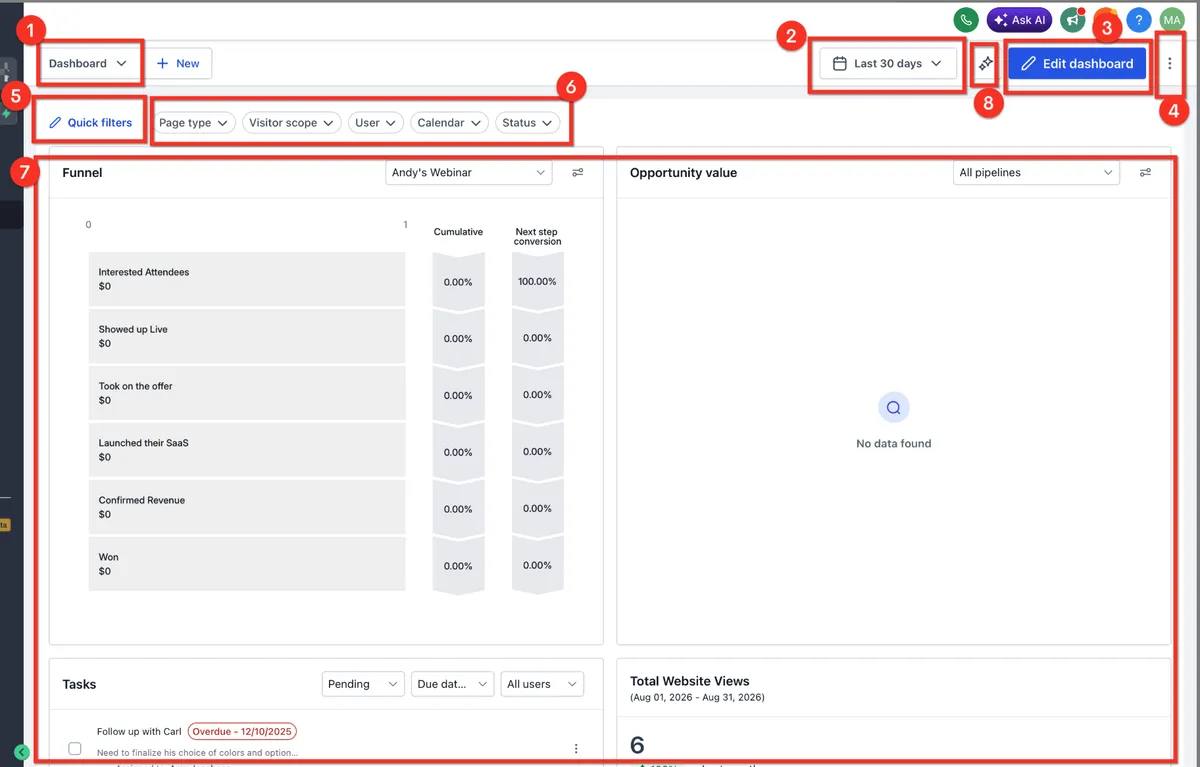
2. ENTER EDIT MODE TO CUSTOMIZE THE DASHBOARD
Click Edit Dashboard to open the widget menu.
Use this area to access all dashboard customization options.
Confirm you are in the correct dashboard before making changes.
Begin by deciding what information should be shown first.
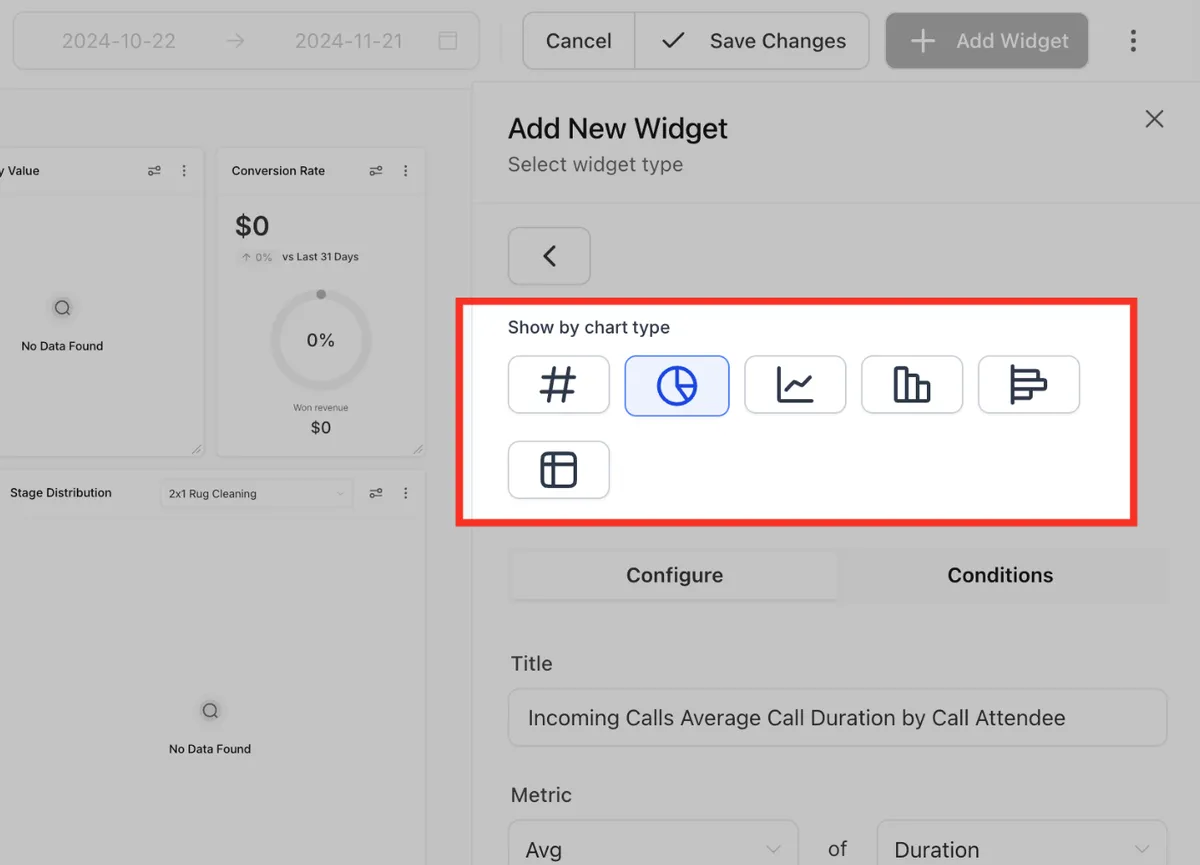
3. CHOOSE THE WIDGET VISUALIZATION FORMAT
Select the display format that best communicates the metric.
Available formats include:
> Numeric for counts and totals
> Doughnut for proportional breakdowns
> Bar for comparisons
> Line for trends over time
> Table for raw detail
Pick the format that tells the story fastest for the user.
For simple totals, choose Numeric.
4. SELECT THE METRIC CATEGORY AND DATA SOURCE
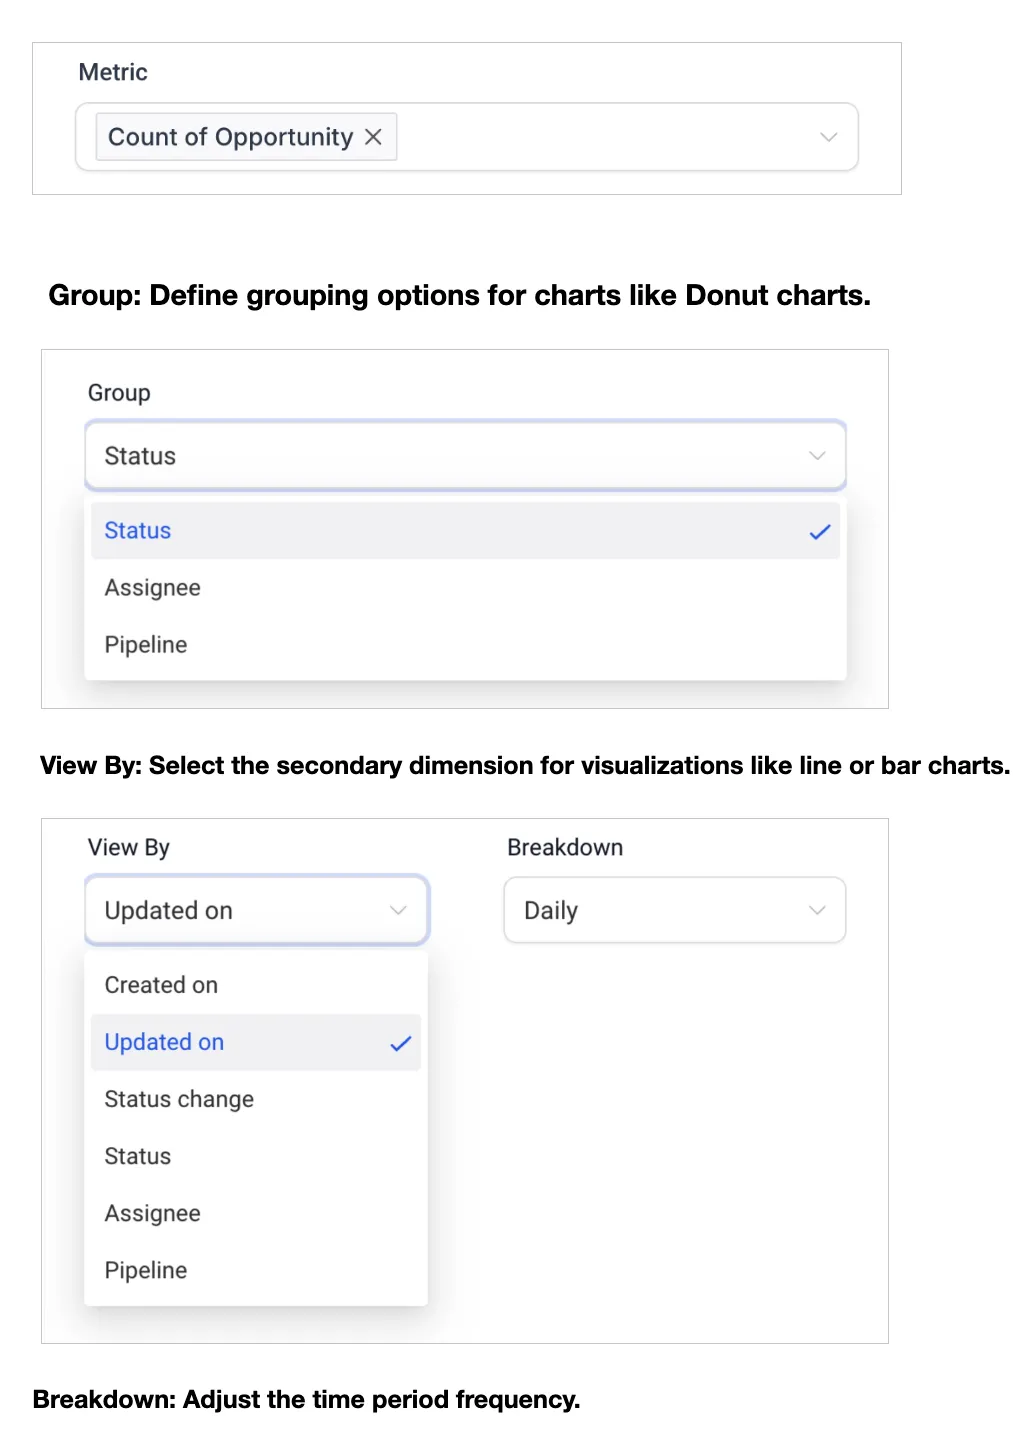
Choose the category you want the widget to display, such as Leads/Contacts or Opportunities.
Select the specific metric, such as total contacts or opportunity count.
Understand that dashboard data is populated from records already in the platform.
Verify that leads and contacts have been imported or added correctly so the widget shows accurate numbers.
5. CONFIGURE WIDGET DETAILS & ADVANCE SETTINGS
Open the widget configuration area after selecting the category and metric.
Add a text box if needed, or embed custom code if your dashboard requires it.
Adjust widget properties such as:
Metric label
Date range
Advanced settings
Review the widget preview or placement before saving.
Save the widget to add it to the dashboard.
6. ADD ADDITIONAL WIDGETS
Repeat the widget setup process for additional metrics.
Example widgets may include:
Contacts total
Opportunities total
After each widget is configured, click Save.
Once all widgets are added, click Save Changes to finalize the dashboard.
Confirm the dashboard now displays the saved metrics in the layout you want.
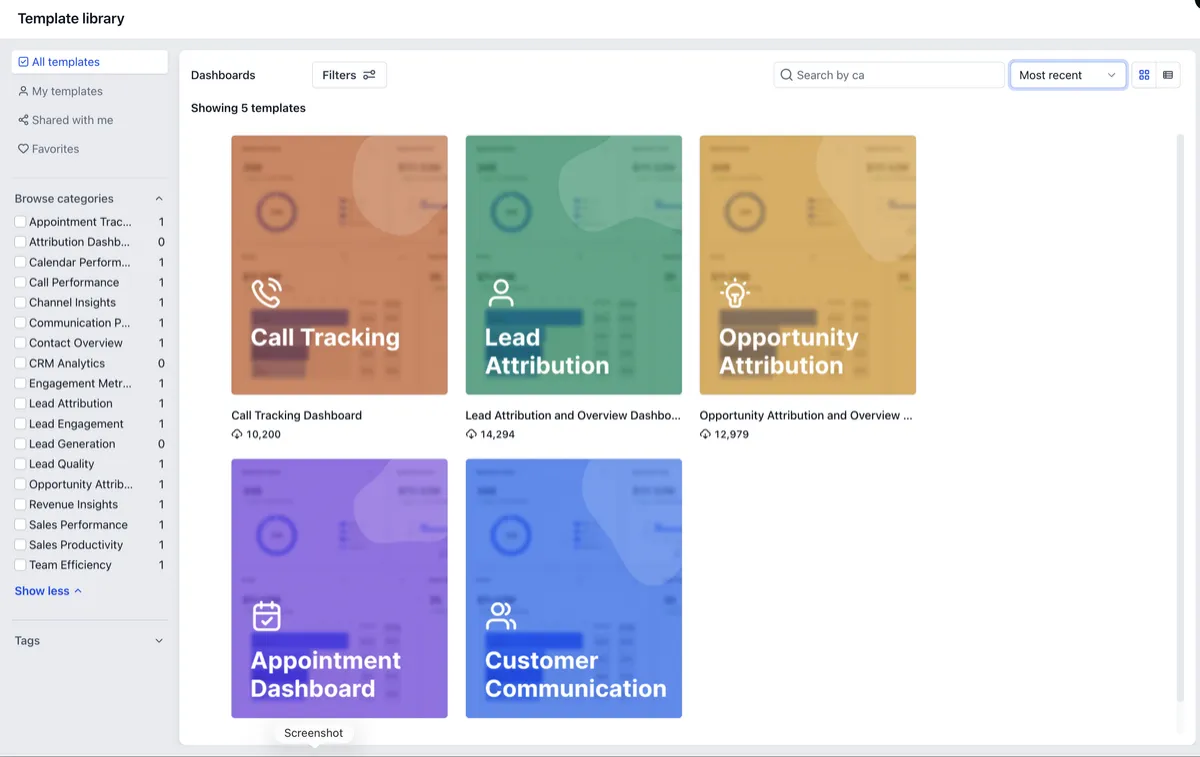
7. DASHBOARD FROM A TEMPLATE
If the default dashboard is not sufficient, choose the option to create a new dashboard.
Select the template library to start from a prebuilt dashboard.
Browse available categories and choose the one that matches your business needs.
Example categories may include:
Call tracking
Lead attribution
Other performance-focused templates
Select the template that best fits your company niche.
8. REVIEW THE AUTO POPULATED TEMPLATE AND EDIT WHAT'S MISSING
After selecting a template, review the auto-populated dashboard.
Check whether all required metrics are present and accurate.
If any metrics are missing or incomplete, click Edit.
Add the missing widgets or adjust existing ones.
Save the updated dashboard once it reflects the correct data.
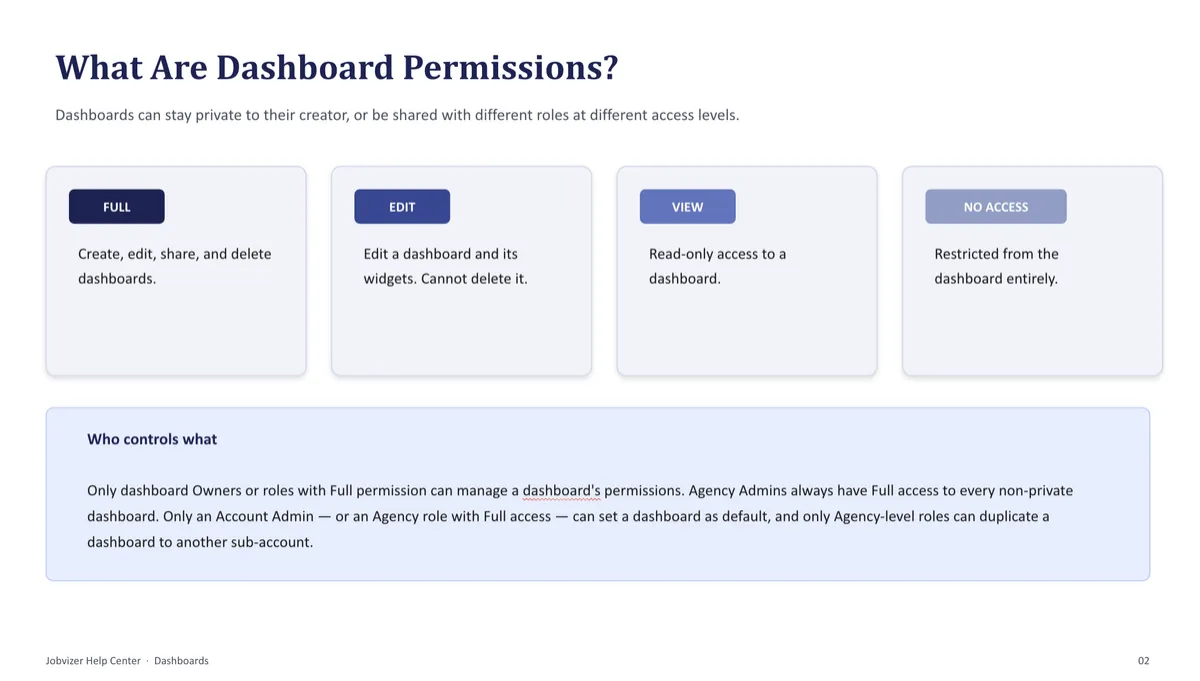
9. SET DASHBOARD PERMISSIONS
Review who should be able to create, view, or edit dashboards.
Note that only admins and users with full access can create dashboards.
Assign permissions based on user role:
View only for users who only need access to see the dashboard
Edit for users who need to modify widgets
Full access for users who need to create and manage dashboards
Save permission settings after assigning access levels.
Cautionary Notes
Only admins and users with full access can create dashboards.
Users must have view permission to see a dashboard.
Dashboard metrics depend on the quality and completeness of data already entered into the platform.
Always review widget settings before saving to avoid incorrect date ranges or missing metrics.
Be careful when assigning permissions so users do not receive more access than needed.
Tips for Efficiency
Start with a template if you want a faster setup.
Use numeric widgets for quick KPI visibility.
Keep dashboards focused on the few metrics that matter most.
Add only the widgets that support decision-making to avoid clutter.
Save changes after each major update to prevent losing work.
Revisit the dashboard regularly and remove metrics that are no longer useful.
JOBVIZER MARKETING SUPPORT PORTAL© 2026ALL RIGHTS RESERVED