MY PROFILE & MY STAFF
JOBVIZER CRM VIDEO TUTORIAL
This SOP explains how to update an individual user’s profile settings and how to add, configure, and manage staff access within a sub-account. It ensures team members understand the difference between personal settings and company-wide settings, and apply the correct permissions for each user.
MY PROFILE
1.
My Profile controls settings for the individual logged-in user only.
Use it to manage:
Login credentials
Notification preferences
Personal calendar connections
Business Profile applies to the entire sub-account and affects everyone.
Quick rule:
My Profile = personal settings
Business Profile = company settings
2.
Enter or review your:
First name
Last name
Email address
Connected calendar
Add or update your signature if needed.
Change your password from this page when required.
Confirm all details are accurate before saving.
3.
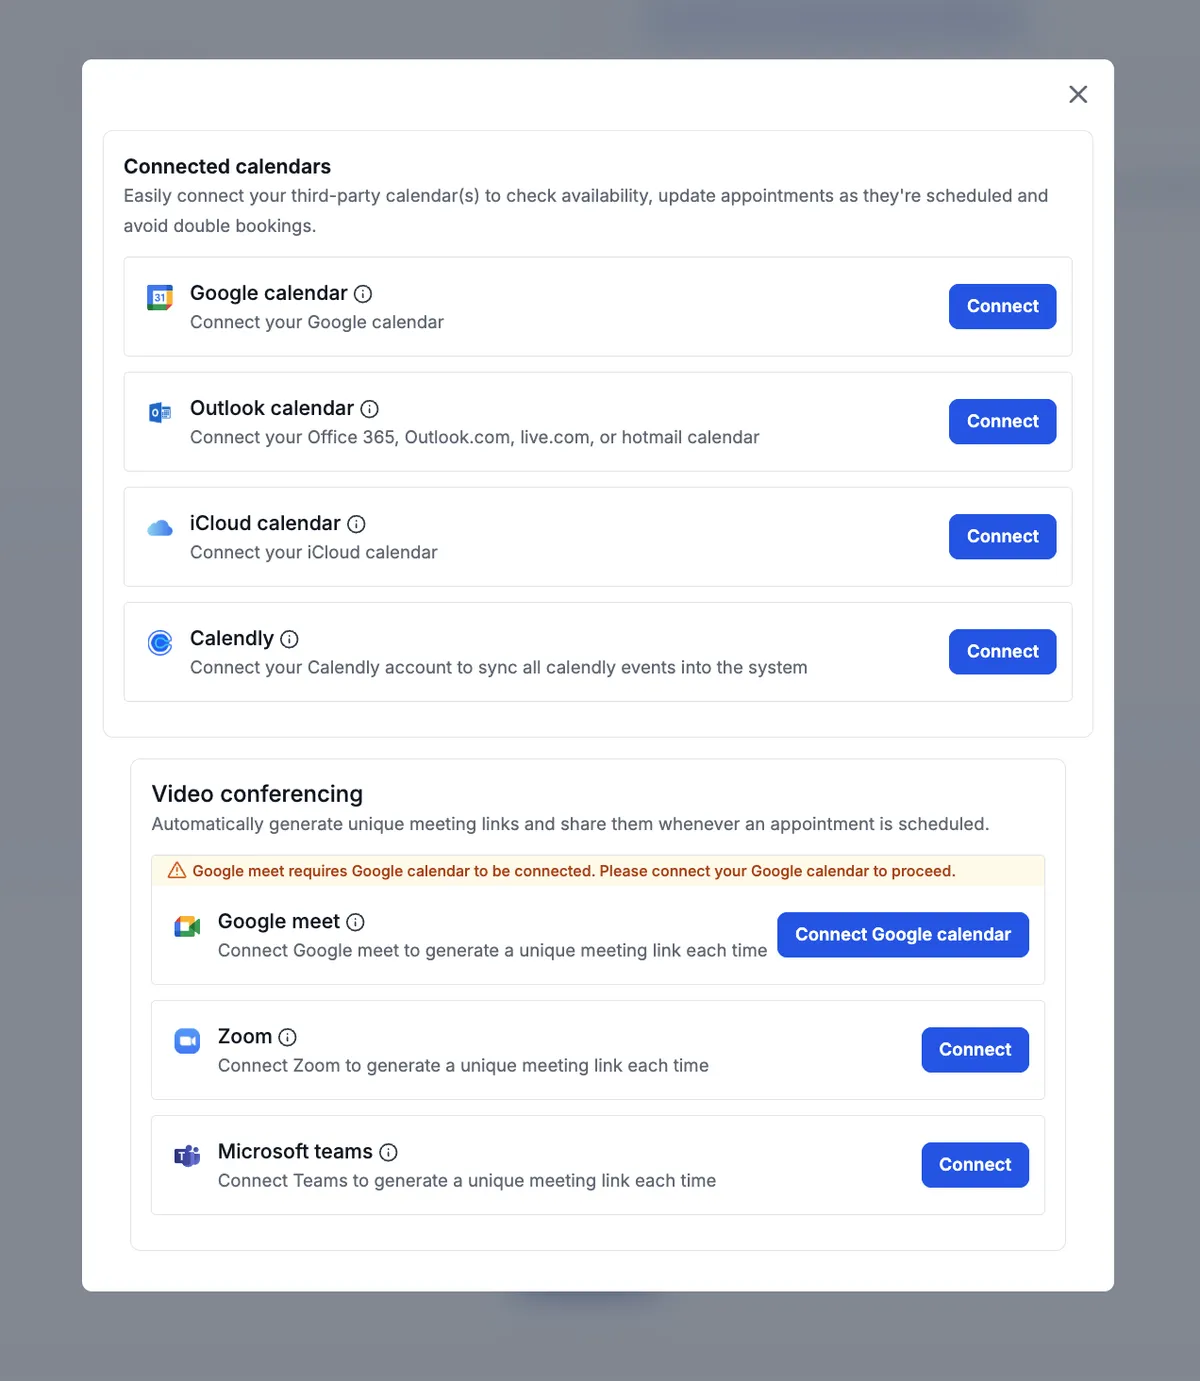
Link your preferred email and calendar services, such as:
Gmail
Outlook
Google Calendar
iCloud Calendar
Connect your video conferencing platform, such as:
Google Meet
Zoom
Microsoft Teams
Make sure the connected tools match the way you schedule and meet with clients.
4.
Configure your working hours and availability schedule.
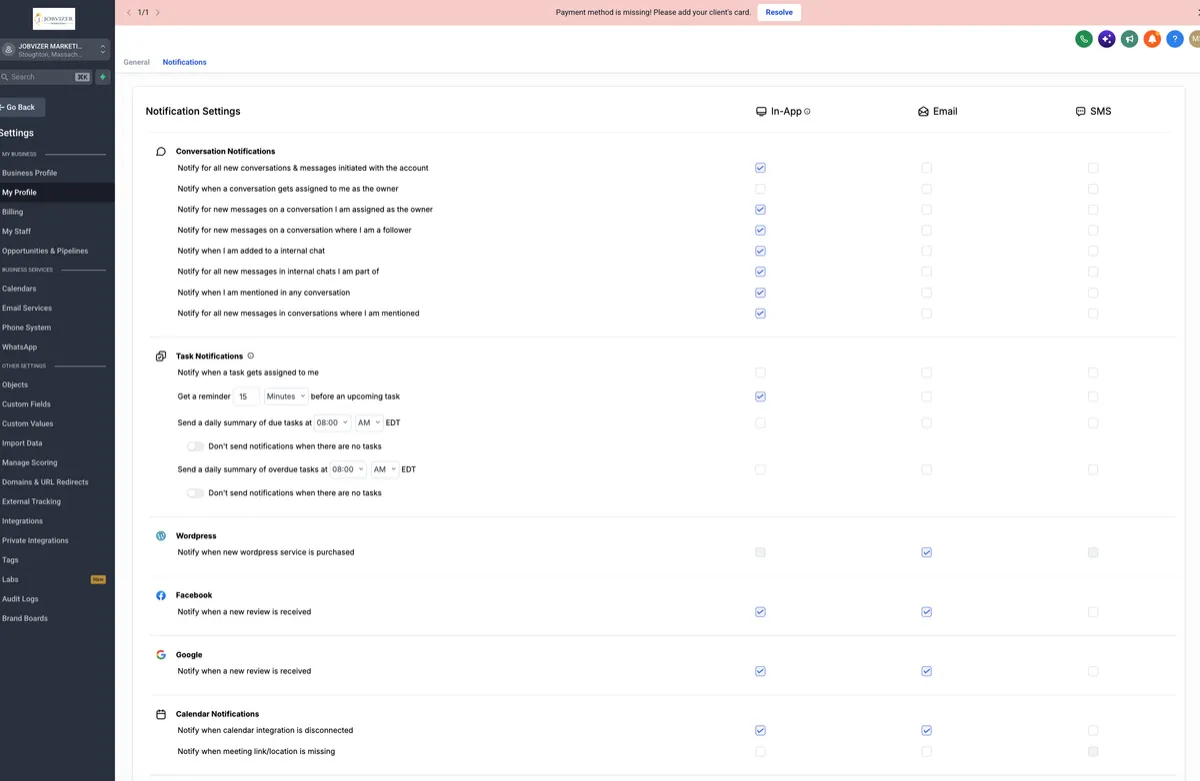
Set notification preferences based on how you want to be alerted.
Notification options may include:
In-app notifications
Email notifications
SMS notifications
Adjust notification timing and method to match your workflow.
MY STAFF
1.
Go to My Staff to view all users added to the sub-account.
Use this section to:
Add new users
Edit existing users
Remove users when needed
This area also controls user roles and permissions.
2.
Select Add User.
Enter the new user’s:
First name
Last name
Email address
Confirm the email is correct because it will be used for account login and communication.
Assign the appropriate role and permissions before saving.
3.
Review the available access options for the user.
Enable only the features and modules the user needs.
Toggle off access to any feature they should not use.
Use permissions to control:
Which modules they can see
Which actions they can take
How much account data they can view
4.
If the user needs a phone number, assign it in the Call and Voicemail settings.
Upload a voicemail message if required.
Set the user’s availability and hours of operation.
Configure their calendar settings.
Adjust their notification settings to match their role and responsibilities.
5.
Understand the difference between roles and scopes before assigning access.
Role guidance:
Agency Admin: Full access to everything, including dashboard, accounts, billing, configuration, and sub-account creation/deletion.
Agency User: Access to the agency dashboard with restrictions, usually limited to assigned sub-accounts.
Account Admin: Full access within one sub-account, including settings.
Account User: Day-to-day access within one sub-account with restricted settings and no destructive actions.
Assign the least access needed for the person’s job.
6.
Default new team members and clients to Account User scope.
Reserve Agency Admin for the owner and one trusted operations lead.
Only upgrade permissions after:
Training is completed
Explicit sign-off is given
Do not grant elevated access preemptively.
Cautionary Notes
Do not confuse My Profile with Business Profile. My Profile affects only the logged-in user; Business Profile affects the entire sub-account.
Verify email addresses carefully when adding staff, since the email is used for login and account communication.
Limit permissions to the minimum necessary to reduce the risk of accidental changes or unauthorized access.
Avoid assigning Agency Admin access unless absolutely necessary. This role has the highest level of control.
Do not upgrade user access before training and approval.
JOBVIZER MARKETING SUPPORT PORTAL© 2026ALL RIGHTS RESERVED