INVOICES & ESTIMATES
CLICK BELOW TO WATCH the walkthrough
This SOP explains how to set up defaults, create estimates, convert approved estimates into invoices, and send billing documents to clients. It ensures documents are consistent, professional, and easy to track within the platform.
1. Understand the purpose of estimates and invoices
Use estimates to present a proposal to a client before work begins.
Use invoices to request payment once work is due.
Take advantage of the platform to build clients, collect approval, and get paid without leaving the system.
Remember that approved estimates can be converted into invoices quickly, avoiding duplicate data entry.
Go to Invoices > Templates.
Create a new invoice template or open an existing one.
Enter invoice details such as:
Business information
Customer information
Product or service details
Amount due
Tax settings, if applicable
Terms
Attachments
Save the template once all required fields are complete.
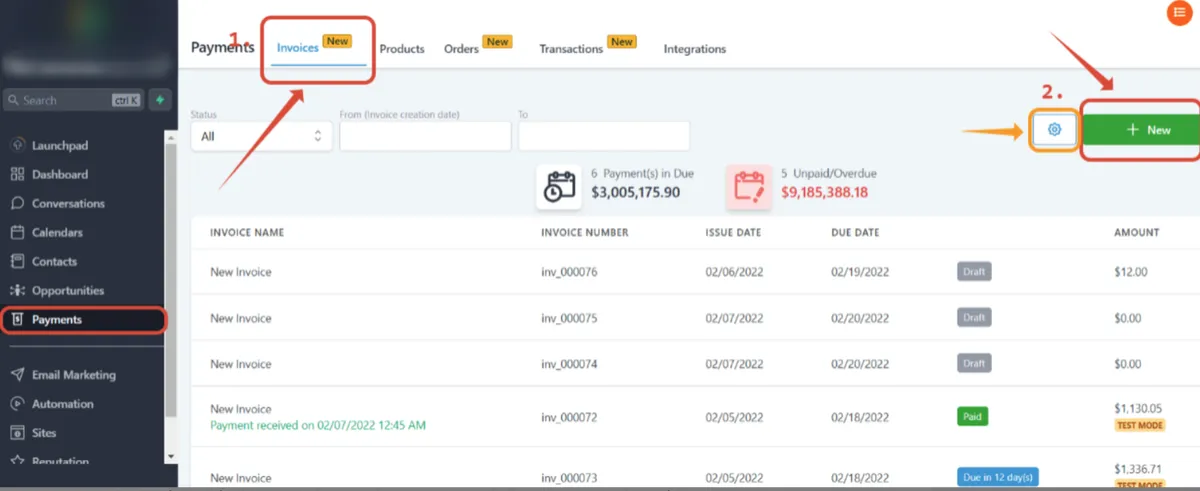
Go to the Payments tab and click on the invoice tab
Click on the button "New" and start creating a new invoice.
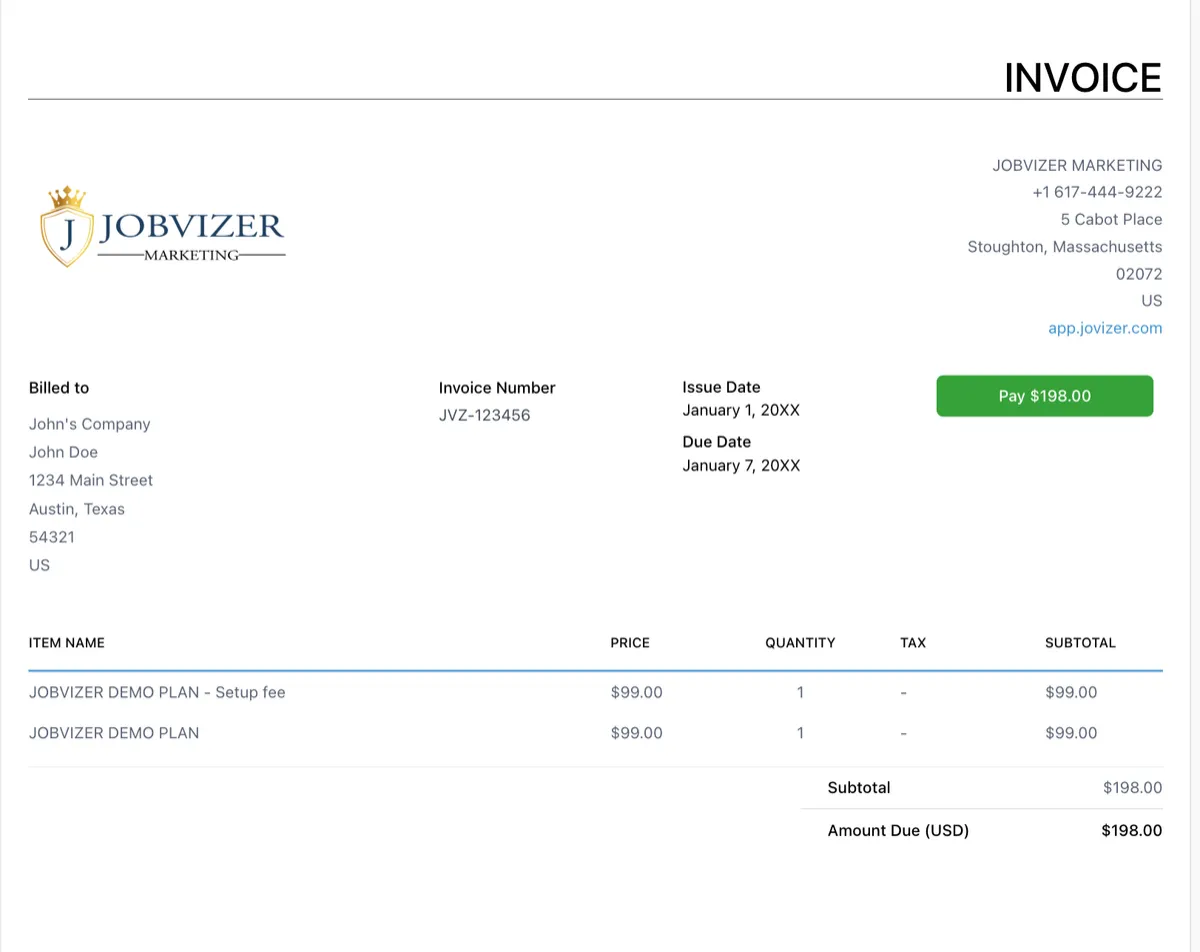
SAMPLE INVOICE PREVIEW
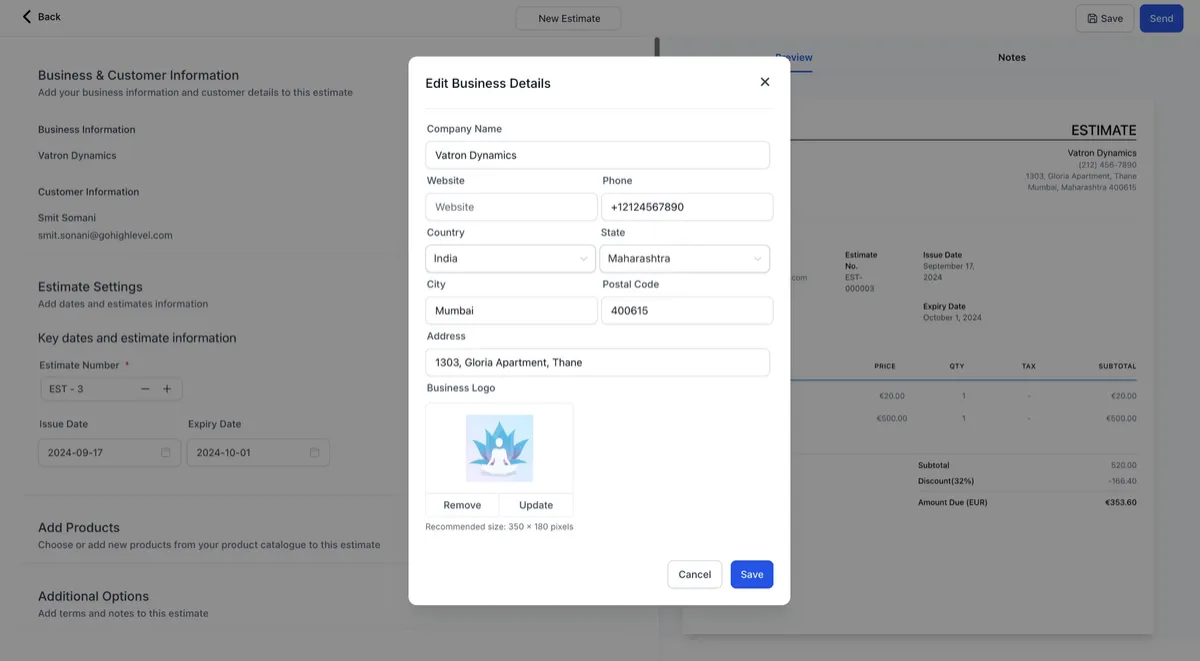
Go to Invoice and Estimates > Settings.
Configure your global defaults before creating any documents.
Include key branding and document settings such as:
Logo
Estimate title and terms
Payment settings
Invoice prefixes
Reminder settings
Customer notifications
Team notifications
Review the preview to confirm the template looks professional and consistent.
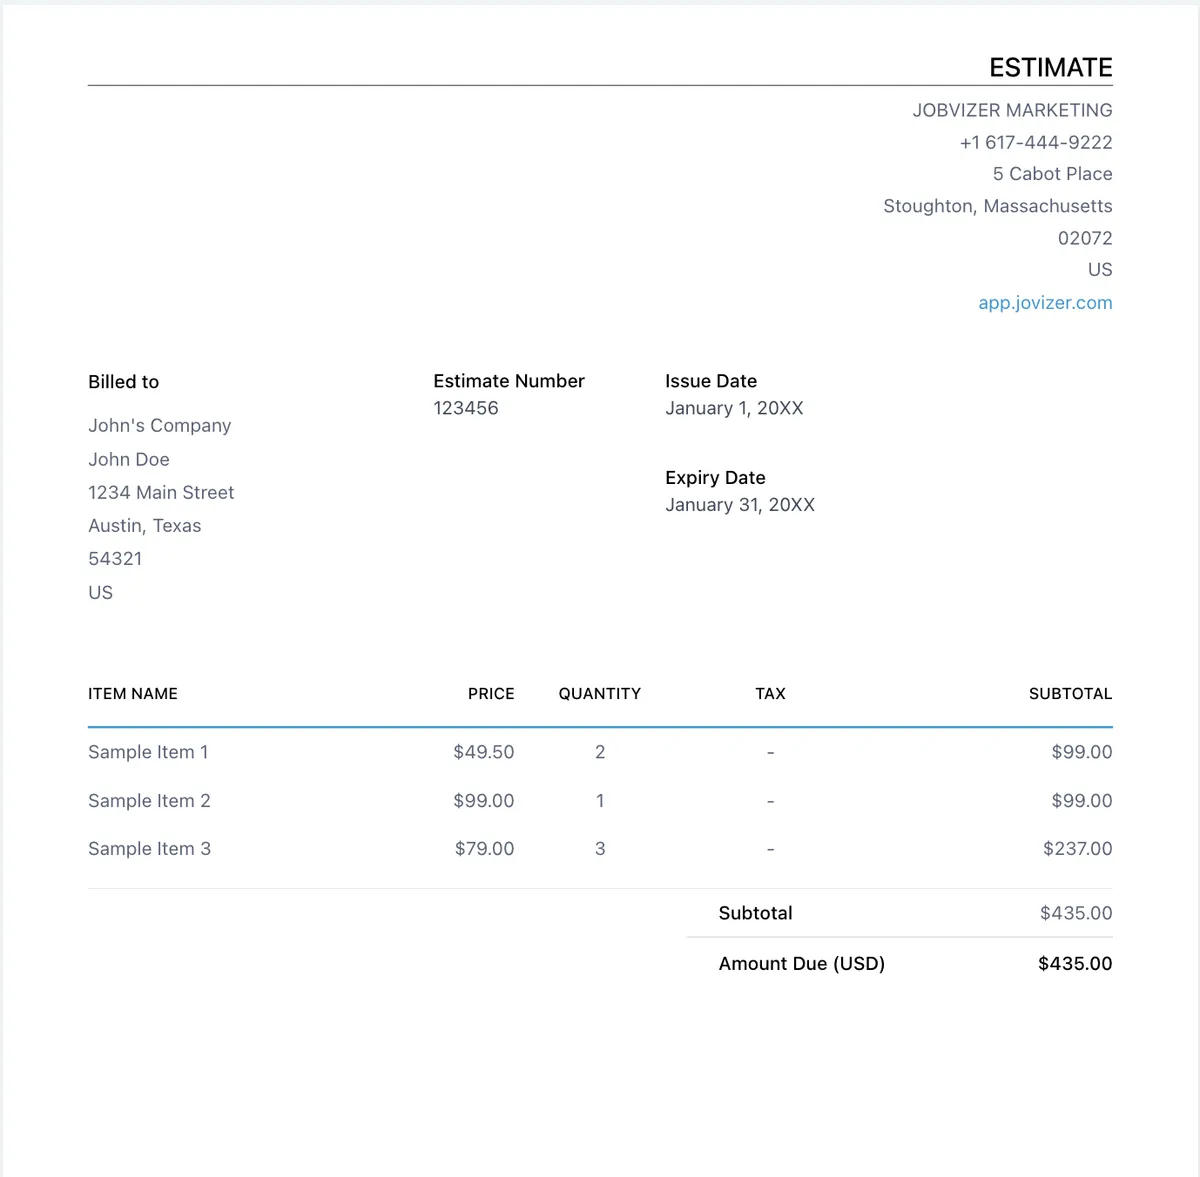
To create an Estimate: Click on 'New' button and enter the details such as business information, customer information, Estimate number, Expiry
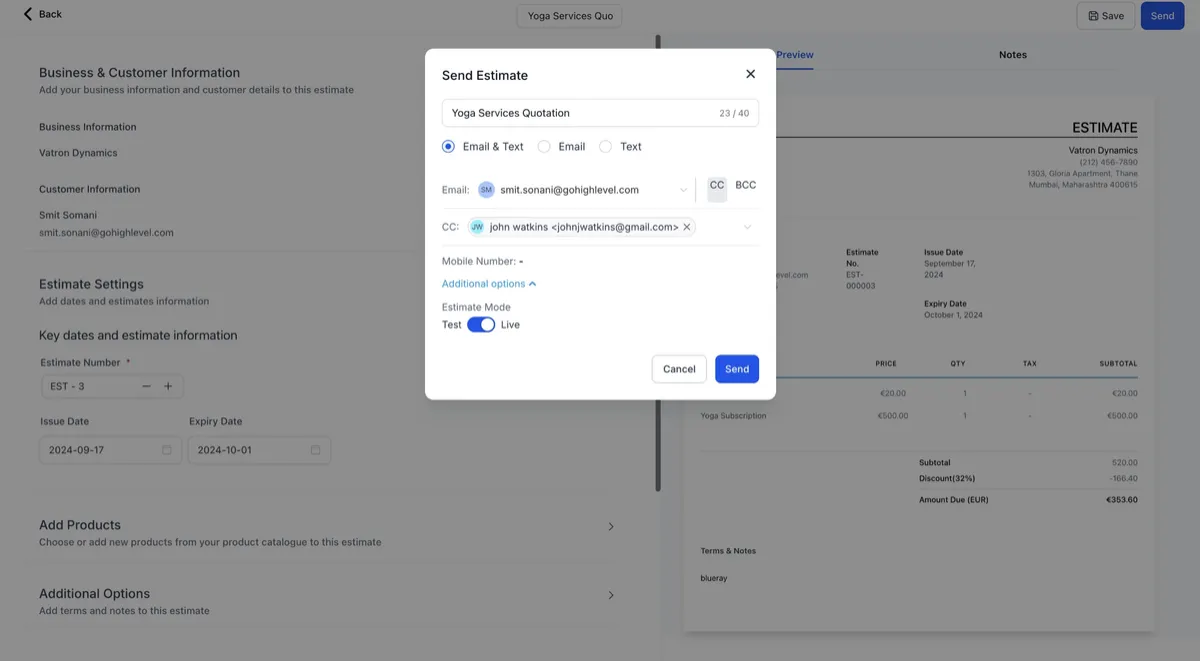
Add products to the estimate and click on send
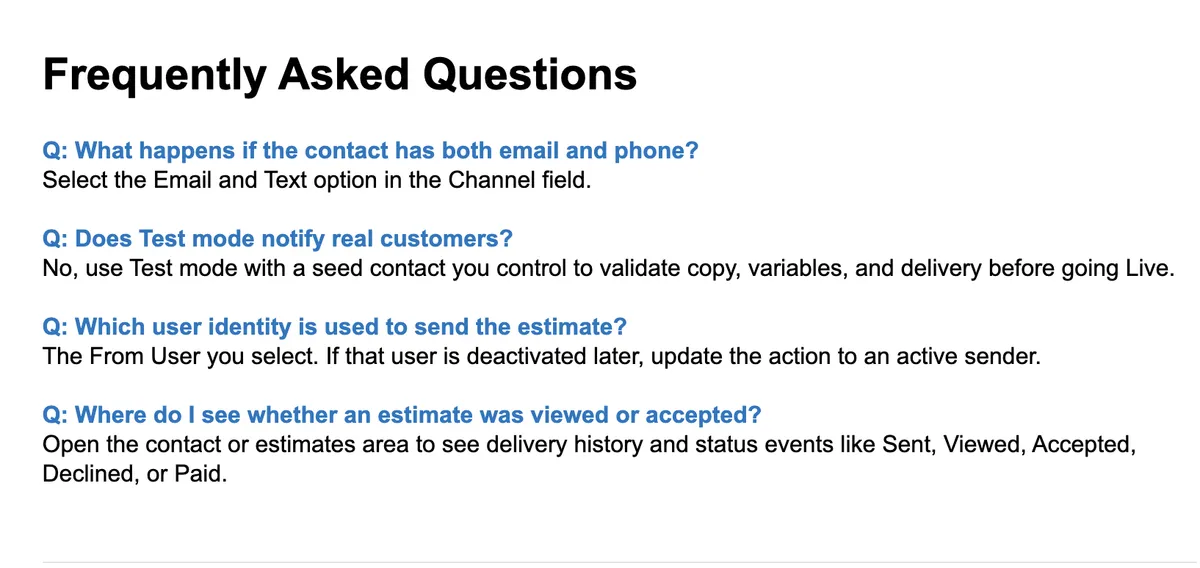
Send to Client: Review the estimate and send it directly to your client via email or SMS.
DISCLAIMER
Users/sender can accept/reject this estimate
Users can click on accept and this estimate will be marked as accepted
Users can click on reject, add notes and this estimate will be marked as rejected
Users can click on Mark as accepted/rejected if user has already confirmed on phone
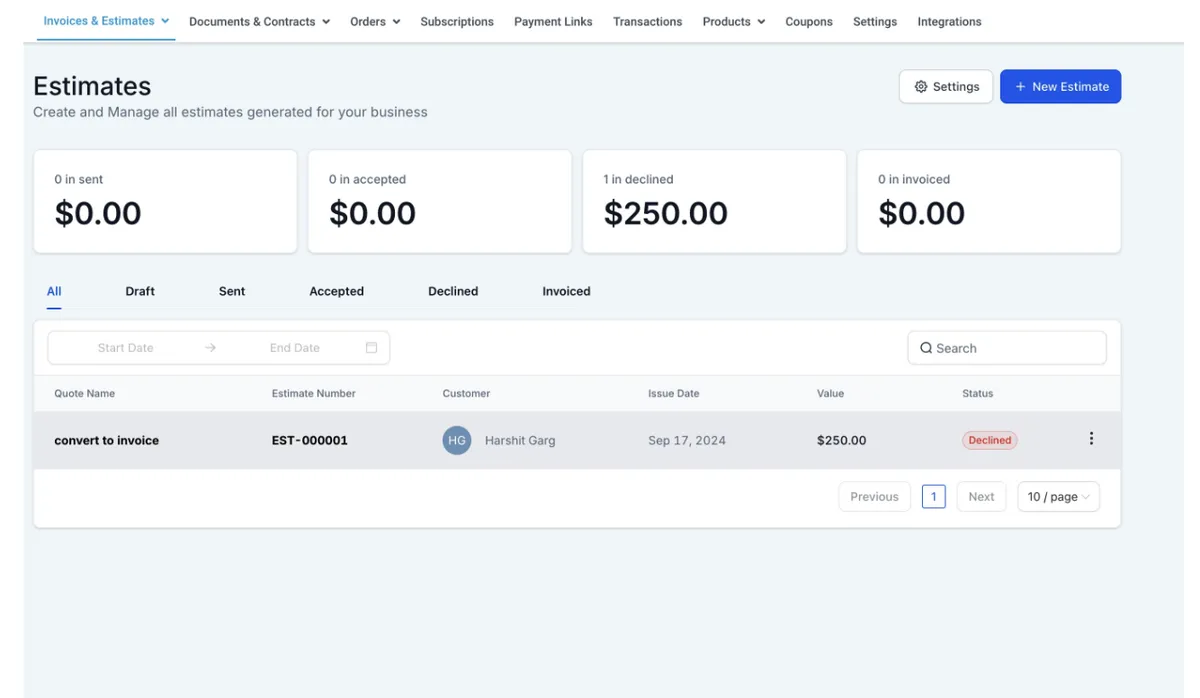
CONVERT TO INVOICE
Click on sent invoice item
Convert to Invoice: Once your client approves the estimate, you can easily convert it into an invoice by selecting
create an invoice from the dashboard or opening the accepted estimate and then clicking on create an invoice.
TRACK
Keep a track of all the estimates that are in different stages: Draft, Sent, Accepted, Declined, Invoiced
Keep a track of value of estimates that are in pipeline from the cards on top of the dashboard
Keeptrack of notes added by users on the dashboard and within the estimate builder
Why We Built It?
The Estimates feature was built to complete the payment suite for all your business needs!
Create an estimate > Get a Document Signed > Send an invoice
SAMPLE ESTIMATE PREVIEW
Cautionary Notes
1. Set up defaults before creating any documents.
2. Send billing reminders and notifications so clients are alerted before invoices become overdue.
3. Link invoices and estimates to opportunities to keep revenue visibility tied to the deal pipeline.
4. Do not create estimates or invoices before setting up global defaults; this can lead to inconsistent branding
and repeated manual work.
5. Make sure customer details, pricing, and terms are accurate before sending.
6. Confirm whether tax should be applied to the invoice before saving or sending.
7. Use reminders carefully so clients are notified before invoices become overdue.

JOBVIZER MARKETING SUPPORT PORTAL© 2026ALL RIGHTS RESERVED