BUSINESS PROFILE SETTINGS
JOBVIZER CRM VIDEO TUTORIAL
Ensure every sub-account user or owner accurately completes the business profile settings so the account information matches the business details required for A2P registration and profile verification. This SOP helps prevent mismatches, missing fields, and delays in setup.
KEY STEPS
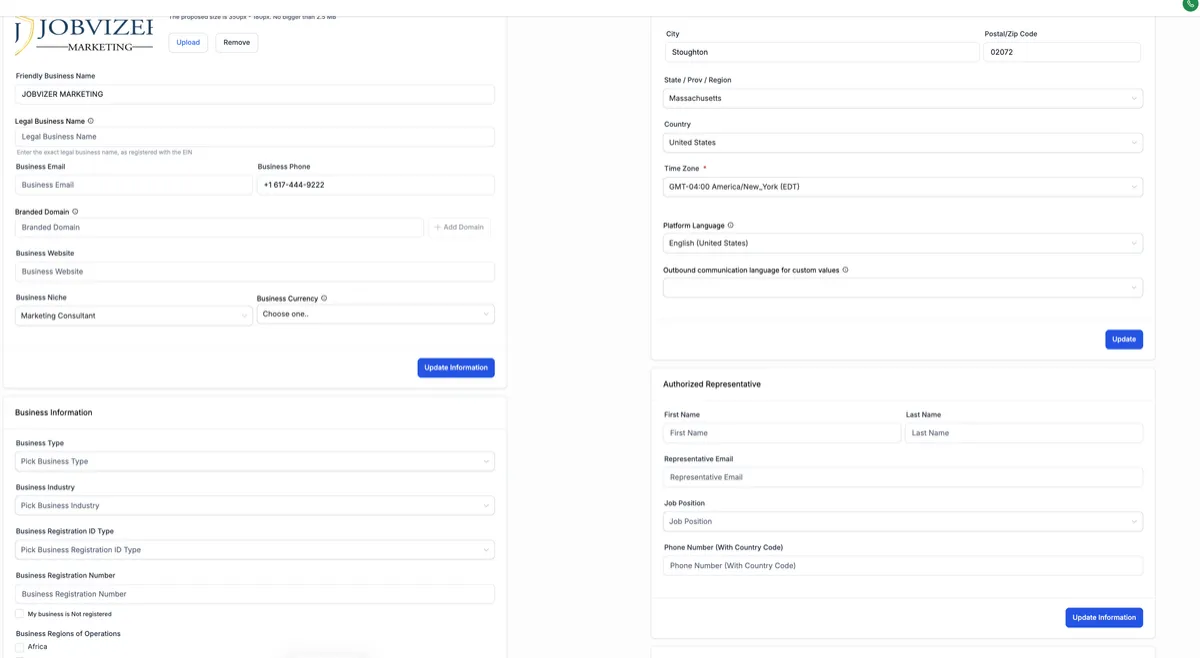
Navigate to the Business Profile Settings area for the sub-account.
Confirm that the owner or sub-account user is responsible for completing the profile.
Gather all required business details before
entering information:
Legal business name
Friendly business name
Business email
Business phone number
Website address
Business niche/industry
Physical business address
Time zone
Business structure and registration details
Authorized representative details
Logo (optional)
Make sure the information you enter will match the business details used for registration and account verification.
Fill in the general information section carefully.
Enter the following fields:
Legal business name
Friendly business name
Business email
Business phone number
Website address
Business niche or industry
Use an email address that reflects the business name when possible.
Example: [email protected]
Example: [email protected]
If you use a custom business domain, ensure it still matches the business identity.
After making changes, click Update Information to save the section.
Enter the physical business address in the designated field.
Select the correct time zone for the business.
Review the information for accuracy before saving.
Click Update after entering or changing these details
In the business information section, select the correct business structure:
Corporation
Sole proprietor
Select the appropriate industry.
Choose the correct registration type.
If the business does not have an EIN, do not select an EIN-related option.
Indicate that the business is not registered if applicable.
Ensure the selections match the actual legal status of the business.
Identify the authorized representative who will be registered for A2P.
Enter the representative’s:
First name
Last name
Email address
Phone number
Set the job title as CEO when required for owner-based registration.
Confirm that the representative information matches the person responsible for the account and registration.
Upload the business logo if available.
Review all completed fields for accuracy and consistency.
Confirm that the business profile matches the sub-account and A2P registration details.
Save or finalize the profile once everything is complete.
Use this completed profile as the official business record for the account.
JOBVIZER MARKETING SUPPORT PORTAL© 2026ALL RIGHTS RESERVED